
Learn how to make halloween decorations out of paper with our step-by-step guide. From paper lanterns to paper bats, create a spooky and unique decor for your home.
Halloween is a fun and exciting time of year, and what better way to celebrate than by creating your own decorations? DIY decorations are a great way to add a personal touch to your home, and paper decorations are an excellent option. Not only are they easy to make, but they’re also affordable and customizable.
DIY decorations have become increasingly popular in recent years, and for a good reason. They allow you to express your creativity and save money at the same time. By creating your own decorations, you can customize them to your liking and make sure they fit perfectly with your home’s decor. Plus, it’s a fun activity to do with family and friends.
In this article, we’ll be providing step-by-step instructions for creating various paper Halloween decorations. From paper lanterns to paper bats, we’ll cover it all. We’ll also be sharing tips for creating the perfect paper decorations and how to display them in your home. So, let’s get started and make this Halloween a memorable one with our DIY paper decorations!
Materials Needed
List of Materials
To make your own paper Halloween decorations, you’ll need a few basic materials. Here’s a list of what you’ll need to get started:
- Colored paper (orange, black, white, green, etc.)
- Scissors
- Glue or tape
- Pencil
- Ruler
- String or ribbon (optional)
Where to Find Materials
Most of the materials needed for paper Halloween decorations can be found at your local craft store. However, if you’re on a tight budget, you can also find these materials at dollar stores or online. Amazon and Etsy are great options for finding affordable and unique paper options. Keep in mind that you may need to order the materials ahead of time to ensure you have everything you need before starting your project. So, be sure to plan accordingly.
Paper Halloween Decoration Ideas
Halloween is just around the corner, and what better way to get into the spirit than by making your own paper decorations? Here are step-by-step instructions for making various paper Halloween decorations:
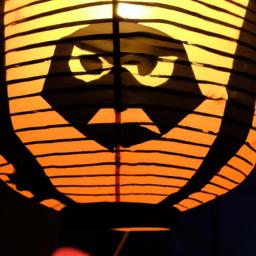
1. Paper Lanterns
Paper lanterns are an easy and fun way to add some Halloween flair to your home. To make them, you’ll need:
- Colored paper
- Scissors
- Tape
- String or ribbon
- LED tea lights
Instructions:
- Cut your paper into a square shape.
- Fold the paper in half, then in half again.
- Make cuts along the folded edges, being careful not to cut all the way through.
- Unfold the paper and tape the two short ends together.
- Attach a string or ribbon to the top of the lantern.
- Place an LED tea light inside the lantern and hang it up.
2. Paper Bats
Paper bats are a classic Halloween decoration that’s easy to make. Here’s what you’ll need:
- Black construction paper
- Scissors
- Tape
- String
Instructions:
- Cut your paper into a bat shape.
- Fold the wings in half and cut small slits at the top of each wing.
- Tape a string to the back of the bat.
- Hang the bats up around your home.
3. Paper Ghosts
Paper ghosts are a spooky decoration that’s sure to delight your guests. To make them, you’ll need:
- White tissue paper
- String or ribbon
- Scissors
Instructions:
- Cut your tissue paper into a square shape.
- Place a small object (like a marble or a small ball) in the center of the tissue paper.
- Gather the tissue paper around the object and tie it off with string or ribbon.
- Cut the bottom of the tissue paper into a fringe to create the ghost’s “tail.”
4. Paper Pumpkins
Paper pumpkins are a festive decoration that’s perfect for Halloween. Here’s what you’ll need:
- Orange construction paper
- Scissors
- Tape
Instructions:
- Cut your paper into a pumpkin shape.
- Fold the paper in half, then in half again.
- Make cuts along the folded edges, being careful not to cut all the way through.
- Unfold the paper and tape the two short ends together.
- Cut a small piece of green paper to make the stem and tape it to the top of the pumpkin.
5. Paper Spiders
Paper spiders are a creepy decoration that’s easy to make. Here’s what you’ll need:
- Black construction paper
- Scissors
- Tape
- Googly eyes
Instructions:
- Cut your paper into a spider shape.
- Cut out eight legs and attach them to the body with tape.
- Attach the googly eyes to the spider’s head.
- Hang the spiders up around your home.
6. Paper Garlands
Paper garlands are a versatile decoration that can be used in a variety of ways. Here’s what you’ll need:
- Colored paper
- Scissors
- Tape
- String or ribbon
Instructions:
- Cut your paper into strips of equal size.
- Fold each strip in half and tape the two short ends together to create a loop.
- String the loops together to create a garland.
- Hang the garland up around your home.
These paper Halloween decorations are easy to make and will add a spooky touch to your home this Halloween. So grab some paper and get creative!
Tips for Creating the Perfect Paper Halloween Decorations
Tips for Choosing the Right Paper
When it comes to creating paper Halloween decorations, selecting the right paper is essential. Not all paper is created equal, and different types of paper will work better for different types of decorations. For example, tissue paper works well for creating paper lanterns, while cardstock is ideal for making sturdy decorations like paper ghosts and pumpkins.
Before you begin your project, take the time to research and select the appropriate paper for your decoration. Make sure the paper is durable enough to withstand the elements if you plan on displaying your decorations outside.
Suggestions for Getting Creative with Designs and Colors
One of the best things about DIY decorations is that you can get as creative as you want. Don’t be afraid to experiment with different designs and colors to make your decorations stand out. You can use stencils, cutouts, or even freehand designs to create unique and personalized decorations.
Consider incorporating different textures and patterns into your decorations to add depth and interest. You can also try using metallic or glitter paper to make your decorations sparkle and shine.
Advice on How to Make the Decorations Look Professional
While DIY decorations are meant to be homemade, that doesn’t mean they have to look amateurish. With a few simple tips, you can make your paper Halloween decorations look professional and polished.
First, take your time when cutting and assembling your decorations. Use sharp scissors or a crafting knife to ensure clean lines and edges. Make sure your decorations are symmetrical and well-balanced.
Second, pay attention to the details. Add finishing touches like ribbons, bows, or other embellishments to give your decorations a polished look. And finally, display your decorations in a way that highlights their best features. Consider grouping them together or using lighting to create a dramatic effect.
By following these tips, you can create paper Halloween decorations that are both fun and professional-looking.
How to Display Your Paper Halloween Decorations
Once you’ve created your paper Halloween decorations, it’s time to show them off! Here are some suggestions for where to display your paper decorations and tips for creating a cohesive look.
Suggestions for Where to Display Your Paper Halloween Decorations
-
Front Porch – Welcome trick-or-treaters with a spooky display on your front porch. Hang paper lanterns or garlands from the ceiling and add paper pumpkins or ghosts to the steps.
-
Living Room – Add a festive touch to your living room by hanging paper bats or spiders from the ceiling. Place paper pumpkins or ghosts on tables or shelves for an extra spooky touch.
-
Dining Room – Create a spooky tablescape with paper Halloween decorations. Add paper bats or spiders to your chandelier and place paper pumpkins or ghosts on your table.
-
Bedroom – Add a subtle touch of Halloween to your bedroom with paper decorations. Hang paper bats or spiders from the ceiling or add paper pumpkins or ghosts to your nightstand.
Tips for Creating a Cohesive Look
-
Stick to a Color Scheme – Choose a color scheme for your decorations and stick to it. This will create a cohesive look throughout your home.
-
Vary Sizes and Shapes – Use a variety of sizes and shapes for your paper decorations to add visual interest.
-
Mix and Match – Mix and match different types of paper decorations to create a unique display.
Ideas for Incorporating Your Paper Decorations into Your Overall Halloween Decor
-
Create a Theme – Use your paper decorations to create a specific theme for your Halloween decor. For example, create a haunted house theme by adding paper ghosts and spiders throughout your home.
-
Use Lighting – Use lighting to highlight your paper decorations. Add string lights or candles to create a spooky ambiance.
By following these tips, you can create a cohesive and spooky display using your paper Halloween decorations. Have fun and get creative with your display!
Conclusion
In conclusion, making Halloween decorations out of paper is a fun and creative way to add a personal touch to your home this Halloween season. DIY decorations are a great way to express your creativity and save money at the same time, and paper decorations are an excellent option for those who are new to DIY projects.
In this article, we have provided step-by-step instructions for creating various paper Halloween decorations, including paper lanterns, paper bats, paper ghosts, paper pumpkins, paper spiders, and paper garlands. We have also shared tips for creating the perfect paper decorations and how to display them in your home.
By following these instructions and tips, you’ll be able to create unique and beautiful paper Halloween decorations that will impress your family and friends. So, get your materials ready, put on some spooky music, and let’s get crafting!
Thank you for reading this article from Decor Ideas Blog. We hope that you have found it helpful and that it has inspired you to get creative with your Halloween decorations this year. Happy crafting!