
Make your graduation day unforgettable with our step-by-step guide on how to decorate grad cap. Express your creativity and stand out with a unique design!
Congratulations! You’re about to graduate, and it’s time to express your unique personality by decorating your grad cap. If you want to stand out from the crowd, this is the perfect opportunity to showcase your creativity and make your graduation day even more memorable.
A grad cap, also known as a mortarboard, is a traditional square-shaped hat worn by graduates during the graduation ceremony. It symbolizes academic achievement and signifies the completion of your studies. While it’s essential to wear the standard black cap and gown, decorating your grad cap allows you to add a personal touch and express your individuality.
In this article, I will guide you through the process of decorating your grad cap step-by-step. We’ll start by discussing the materials you’ll need, explore different design ideas, and provide troubleshooting tips to avoid common mistakes. So, let’s get started and make your grad cap a reflection of your personality!
Materials You’ll Need
Congratulations on deciding to decorate your grad cap! Before we begin, let’s make sure you have all the essential materials needed to create your masterpiece. Here’s a list of the items you’ll need:
Grad Cap
The first thing you’ll need is your graduation cap. You can purchase a plain black cap at your school’s bookstore or online. Make sure it fits comfortably and securely on your head.
Paint
Acrylic paint is the best choice for decorating your grad cap. It dries quickly, and it’s easy to work with. You can find acrylic paint at any craft store or online. Make sure to choose the colors that match your design.
Paintbrushes
You’ll need a variety of paintbrushes of different sizes to create different effects. You can find them at any craft store or online.
Markers
Markers are great for adding details to your design. You can use both permanent and washable markers depending on your design. Make sure to choose the colors that match your design.
Glue
You’ll need a glue gun or double-sided tape to attach embellishments to your grad cap. Choose a glue gun that’s easy to use and has a low-temperature setting to avoid burning yourself.
Embellishments
Embellishments are optional but can add a unique touch to your design. You can use stickers, glitter, rhinestones, flowers, or anything else that fits your design. You can find them at any craft store or online.
Now that you have all the materials you need let’s move on to the next step and explore different design ideas.
Inspiration and Ideas
Congratulations! You’ve got all the materials you need to start decorating your grad cap. Now, it’s time to get inspired and choose a theme that reflects your personality. Decorating your grad cap is a creative process, and the possibilities are endless. Here are some ideas to get you started:
Showcase of Different Styles and Designs for Grad Caps
- The Classic Look: Keep it simple and elegant by adding your name or a meaningful quote to your grad cap. Use a calligraphy pen or stickers to add a touch of sophistication.
- The Glitter Bomb: Add some sparkle to your graduation day by covering your grad cap in glitter. Choose your favorite color and create a dazzling effect that will catch everyone’s eyes.
- The Pop Culture Reference: Show your love for your favorite TV show, movie, or book by incorporating references into your grad cap design. Use quotes, characters, or symbols to make your grad cap stand out.
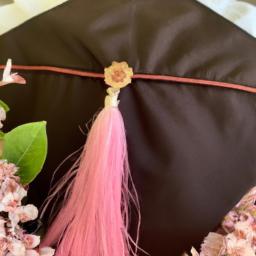
- The Floral Arrangement: Create a stunning floral design by using fake flowers and hot glue to decorate your grad cap. Choose your favorite flower or color scheme to create a beautiful and unique design.
- The DIY Masterpiece: Go all out and create a grad cap that is entirely handmade. Use paint, markers, or fabric to create a design that is entirely yours.
Tips on How to Choose a Theme That Reflects Your Personality
- Think about your interests: What are your hobbies, favorite movies, or books? Use these as inspirations for your grad cap design.
- Consider your future plans: Are you planning to pursue a particular career path or attend a specific college? Incorporate your future goals into your grad cap design.
- Use your favorite colors: Choose a color scheme that represents your personality and style.
- Consider your heritage: Use symbols or quotes that represent your cultural background or family heritage.
Remember, the sky’s the limit when it comes to decorating your grad cap. Use these ideas as a starting point, and let your creativity run wild!
Step-by-Step Guide
Decorating your grad cap is a fun and creative process that allows you to showcase your personality and make a statement on your graduation day. Here’s a step-by-step guide on how to decorate your grad cap and make it unique:
Step 1: Choose Your Design
The first step is to decide on a design. You can choose a theme, add quotes, or use symbols that represent your personality and achievements. Some popular design ideas include using glitter, flowers, or painting your cap with acrylic paint.
Step 2: Gather Your Materials
Once you’ve chosen your design, it’s time to gather your materials. Here’s a list of essential materials you’ll need:
- Grad cap
- Glue gun and glue sticks
- Scissors
- Paintbrushes
- Acrylic paint
- Decorative items (glitter, flowers, stickers, etc.)
Step 3: Prepare Your Grad Cap
Before you start decorating, make sure your grad cap is clean and dry. Remove any stickers or residue from the cap, and let it dry completely.
Step 4: Create Your Design
Now it’s time to create your design. Start by sketching your design on a piece of paper and use it as a guide. Use the glue gun to attach your decorative items to your cap, and let it dry completely before moving on to the next step.
Step 5: Add Finishing Touches
Once your design is complete, it’s time to add finishing touches. Use a paintbrush and acrylic paint to touch up any areas that need it. You can also add glitter or other decorative items to make your design stand out.
Step 6: Let It Dry
After you’ve added all the finishing touches, let your cap dry completely. This will ensure that your design stays in place and doesn’t smudge or smear.
By following these simple steps, you can decorate your grad cap and make it unique and personal. So, get creative and have fun with it!
Troubleshooting
Decorating a grad cap can be a challenging task, and sometimes things don’t go as planned. Don’t worry; we’ve got you covered! In this section, we will discuss some common issues that may arise during the decorating process and provide solutions to fix them. We will also provide suggestions on how to avoid mistakes to ensure your grad cap turns out perfect.
Common Issues and How to Fix Them
Issue #1: Paint Smudging
Paint smudging is a common issue that can occur when the paint hasn’t dried completely or when you touch the wet paint. To avoid smudging, make sure you wait for each layer of paint to dry completely before adding another layer. If you accidentally smudge the paint, you can fix it by adding another layer of paint on top of the smudged area.
Issue #2: Glue Stains
Glue stains are another common issue that can occur when you use too much glue or when the glue leaks from the edges. To avoid glue stains, use a small amount of glue and apply it carefully using a glue gun or a glue stick. If you accidentally create glue stains, you can remove them by gently rubbing the area with a damp cloth.
Suggestions on How to Avoid Mistakes
Suggestion #1: Plan Ahead
Before you start decorating your grad cap, plan ahead and decide on the design you want to create. It’s also a good idea to sketch your design on paper before applying it to your grad cap.
Suggestion #2: Use High-Quality Materials
Using high-quality materials will ensure that your grad cap looks great and lasts longer. Invest in quality paint, stickers, and decorations to create a professional-looking design.
Suggestion #3: Take Your Time
Decorating a grad cap is a time-consuming process, and it’s important to take your time and be patient. Rushing the process can lead to mistakes and a subpar design.
By following these troubleshooting tips and suggestions, you can avoid common mistakes and create a stunning grad cap that reflects your unique personality.
Conclusion
In conclusion, decorating your grad cap is a fun and creative way to celebrate your academic achievement and showcase your individuality. By following the step-by-step guide and exploring different design ideas, you can create a unique and personal grad cap that will make you stand out on your graduation day.
Remember, the materials you’ll need are affordable and easy to find, and there are countless design ideas to choose from. You can also seek inspiration from social media platforms such as Pinterest and Instagram to find the perfect style that suits your personality.
At Decor Ideas Blog, we believe that graduation is a significant milestone in your life, and it deserves to be celebrated in a memorable way. Decorating your grad cap is an excellent opportunity to express your creativity and make your graduation day even more special.
So, let your imagination run wild, and create a grad cap that represents your journey, passion, and personality. Congratulations, graduate!