
Looking for a creative way to personalize your next event? Check out our guide to making and decorating “galletas en forma de letras decoradas“!
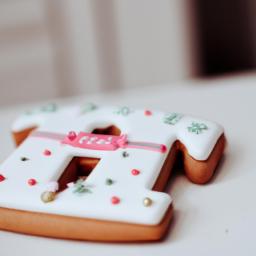
If you’re looking for a unique and creative way to add a personal touch to your next event, look no further than “galletas en forma de letras decoradas.” These cookies, shaped like letters and decorated with a variety of designs and colors, are the perfect addition to any occasion. Whether you’re hosting a birthday party, a wedding, or a corporate event, these cookies are sure to impress your guests and make your event unforgettable.
So, what exactly are decorated letter cookies? Simply put, they are cookies that are shaped like letters and decorated with icing, sprinkles, and other edible decorations. They can be made in a variety of flavors, from classic sugar cookie to chocolate chip, and can be customized to fit any event theme or color scheme.
But why are these cookies so important for events? For one, they add a personal touch that other decorations simply can’t match. By spelling out a special message or the name of the guest of honor, you can make your event feel truly unique and special. Additionally, they are a great conversation starter and can serve as a fun activity for guests of all ages.
The history of decorated letter cookies dates back centuries, with evidence of decorated cookies dating back to ancient Egypt. However, the modern tradition of letter cookies can be traced back to the 16th century in Germany, where they were used to celebrate weddings and other special occasions. Today, they are a popular treat all over the world and can be found at events of all kinds.
In the next sections, we’ll take a closer look at how to make decorated letter cookies, tips for perfecting your designs, and how to incorporate these cookies into your event decor. So, grab your apron and let’s get baking!
Ingredients and Equipment Needed
List of Ingredients for Making the Cookie Dough
Before you start making your decorated letter cookies, you’ll need to gather the following ingredients:
- 2 1/4 cups all-purpose flour
- 1/2 teaspoon baking powder
- 1/4 teaspoon salt
- 1 cup unsalted butter, at room temperature
- 1 cup granulated sugar
- 1 large egg
- 1 teaspoon vanilla extract
Tools and Equipment Required for Making the Cookies
In addition to the ingredients listed above, you’ll need the following tools and equipment:
- Mixing bowls
- Measuring cups and spoons
- Electric mixer or stand mixer
- Rolling pin
- Letter-shaped cookie cutters
- Baking sheets
- Parchment paper or silicone baking mats
- Wire cooling rack
Recommended Brands for Ingredients and Equipment
While you can use any brand of ingredients and equipment you like, we recommend using the following brands for the best results:
- King Arthur Flour for all-purpose flour
- Callebaut for unsalted butter
- Wilton for letter-shaped cookie cutters
- Nordic Ware for baking sheets
With these ingredients and equipment, you’ll be well on your way to making delicious and beautiful decorated letter cookies. In the next section, we’ll go over a step-by-step guide to making these cookies from scratch.
Step-by-Step Guide to Making Decorated Letter Cookies
If you’re ready to try your hand at making your own decorated letter cookies, we’ve got you covered. Follow these simple steps to create your own personalized treats:
Detailed instructions on how to make the cookie dough
To make the perfect cookie dough for your letter cookies, you’ll need the following ingredients:
- 3 cups all-purpose flour
- 1 teaspoon baking powder
- 1/2 teaspoon salt
- 1 cup unsalted butter, at room temperature
- 1 cup granulated sugar
- 1 large egg
- 1 tablespoon pure vanilla extract
- In a large mixing bowl, whisk together the flour, baking powder, and salt.
- In a separate bowl, cream together the butter and sugar until light and fluffy.
- Beat in the egg and vanilla extract until well combined.
- Gradually add the dry ingredients to the wet mixture, mixing until a dough forms.
- Divide the dough into two equal portions and wrap each in plastic wrap. Chill in the refrigerator for at least 30 minutes before using.
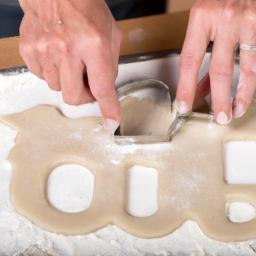
Tips for rolling and cutting the dough into letter shapes
When it comes to rolling and cutting the dough, there are a few tips and tricks to keep in mind:
- Use a floured surface to prevent sticking.
- Roll the dough to a thickness of about 1/4 inch.
- Use letter cookie cutters to cut out your desired shapes.
- Place the cutout cookies on a parchment-lined baking sheet.
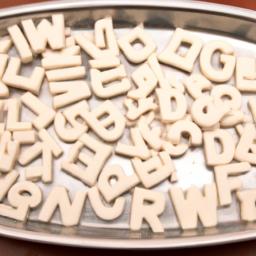
Baking and decorating the cookies
Now it’s time to bake and decorate your letter cookies:
- Preheat your oven to 350°F (180°C).
- Bake the cookies for 10-12 minutes, or until the edges are lightly golden brown.
- Let the cookies cool completely before icing and decorating.
- Use royal icing or your favorite icing recipe to decorate the cookies with your desired designs and colors.
- Let the icing dry completely before serving or storing.
With these simple steps, you’ll be able to create beautiful and delicious decorated letter cookies for any occasion. Happy baking!
Tips for Perfectly Decorated Letter Cookies
Decorated letter cookies are a fun and creative way to add a personal touch to your event. But if you’re not careful, they can be a bit tricky to make. Here are some tips for achieving perfectly shaped and decorated letter cookies:
How to Achieve Flawless Cookie Shapes
- Start with a well-chilled cookie dough. This will make it easier to roll out and cut into shapes.
- Use a sharp, floured cookie cutter to cut out your letters. Press down firmly and wiggle the cutter a bit to ensure a clean cut.
- Chill the cut-out letters for a few minutes before baking. This will help them keep their shape while baking.
- If your letters come out a bit misshapen, use a toothpick to gently reshape them while they’re still warm from the oven.
Tips for Icing and Decorating the Cookies
- Use a piping bag with a small, round tip to pipe the icing onto the cookies. This will give you more control over the design and help prevent smudging.
- Start with a thin layer of icing and let it dry completely before adding additional layers or designs. This will prevent the icing from running or smudging.
- Use toothpicks or a small paintbrush to add small details or accents to your designs.
- Don’t be afraid to experiment with different colors and designs. The possibilities are endless!
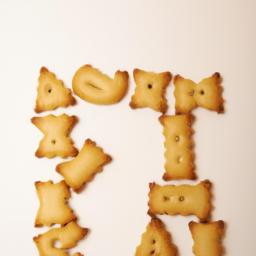
Ideas for Creative and Unique Designs
- Spell out a word or phrase that’s meaningful to you or the guest of honor.
- Use different colors and patterns to create a unique design for each letter.
- Add edible glitter or sprinkles for some extra sparkle and shine.
- Use different types of icing, like royal icing or fondant, to create a variety of textures and designs.
With these tips and ideas, you’ll be well on your way to creating perfectly shaped and decorated letter cookies that are sure to impress your guests. Happy baking!
Occasions to Use Decorated Letter Cookies
Are you wondering what types of events are suitable for decorated letter cookies? The truth is, these cookies are incredibly versatile and can be used for almost any occasion! Here are a few ideas to get you started:
Suitable Events to Serve Decorated Letter Cookies
- Weddings: Spell out the newlyweds’ names or the date of the wedding in letter cookies for a sweet and personalized touch.
- Birthdays: Celebrate the guest of honor by spelling out their name or age in letter cookies.
- Baby Showers: Welcome the new arrival with cookies that spell out the baby’s name or initials.
- Graduations: Congratulate the graduate by spelling out their school or degree in letter cookies.
- Corporate Events: Impress clients and coworkers by spelling out your company name or logo in cookies.
Popular Themes and Color Schemes for Events
When it comes to decorating letter cookies, the possibilities are endless! Here are a few popular themes and color schemes to consider:
- Rustic: Use earthy tones like brown, green, and beige and decorate with floral designs or rustic patterns.
- Nautical: Use navy blue and white and decorate with anchors, sailboats, or seashells.
- Rainbow: Use a variety of bright colors and decorate with rainbow patterns or stripes.
- Holiday: Use traditional holiday colors and decorate with holiday-themed designs like Christmas trees or hearts for Valentine’s Day.
Ways to Incorporate the Cookies into Event Decor
In addition to serving letter cookies as a sweet treat, there are plenty of ways to incorporate them into your event decor. Here are a few ideas:
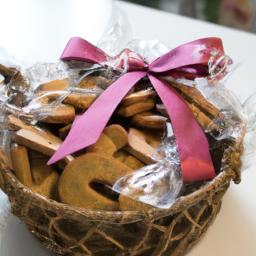
- Place them on a dessert table: Display your letter cookies on a tiered dessert stand or platter for a beautiful and eye-catching presentation.
- Use them as place cards: Write guests’ names on letter cookies and place them at their seats for a personalized touch.
- Hang them as decorations: String letter cookies together with ribbon or twine to create a festive and unique decoration.
No matter how you choose to use them, decorated letter cookies are sure to be a hit at your next event!
Conclusion
In conclusion, “galletas en forma de letras decoradas” are a fun and unique addition to any event. These cookies can be customized to fit any theme or color scheme and are sure to impress your guests. By adding a personal touch with a special message or the guest of honor’s name, you can make your event feel truly unique and special.
Whether you’re an experienced baker or just starting out, making decorated letter cookies is a fun and rewarding activity that anyone can enjoy. With the right ingredients and tools, you can create flawless cookie shapes and stunning designs that will leave your guests speechless.
So, next time you’re planning an event, be sure to consider adding decorated letter cookies to your menu. Your guests will love the personal touch, and you’ll love how easy and fun they are to make.
At Decor Ideas Blog, we’re passionate about helping you create unforgettable events that are both beautiful and meaningful. Check out our website for more inspiration and ideas for your next event.